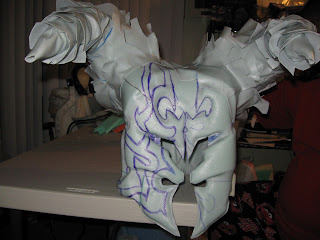
I have already completed one side of the helm so i am starting on the other and let you good folks see how i went about constructing it. In this pic since i already had the base structure of the helm covered with wonderflex, i simply cut out the shape i needed in foam, then took the heat gun and heated up the section of the helm i wanted to work with, and stuck the foam directly to it.
As you can see the foam sticks to it perfectly, next i will cover it with a layer of wonderflex. The reason why i do this is 2 fold:
1) SAVES wonderflex ( you def want be frugal with your use of it, i try to use all my scrap pieces if at all possible)
2) I find when u are building up layers doing it this way allows for way more flexibility when u have to do bends like the one pictured here.
Here I am cutting out a piece of wonderflex to go over the cheek portion of the foam i just attached to the helmet.
Applying the heated up piece of wonderflex i just cut and attaching it to the cheek foam.
The Cheek is good to go. Now i just repeated the same process for the jaw bone section.
I cut out another section of wonderflex and heated it up and applied it over the piece of foam i adhered to the helmet.
Same procedure for the lower jaw.
Ok, now i need to do my trim outline for the plain side of the face. I intend on filling in those trim lines with friendly plastic to give it more dimension.
And here we go the front is almost done, next i need to add a bit of trim to the lower back of the helmet, that is shown in this next pic:
Adding the trim using the same method to conserve on wonderflex, one thing about doing armor this detailed is you run thru the stuff so fast.
Cutting the wonderflex into strips and applying each one at a time to ensure greater control and bend-ability of it.
Each section falling into place well.
Making sure the inside portion on the bottom trim is running flush along the inside of the helmet as well.


No comments:
Post a Comment